Stage 2: Cutting and shaping:
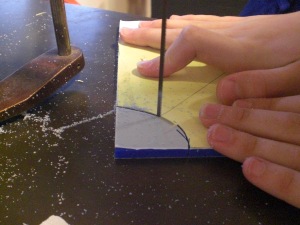 When using this saw it is necessary to remember a number of things,
Keep your fingers away from the moving blade
Hold the plastic down so it does not bounce up and down.
Hold it down just enough so you are able to move the plastic.
Make sure the dust blower is in place to blow the dust away from the part you are cutting.
If you make a mistake cutting from one direction then take the blade out and start the cut from the other direction. See photograph.
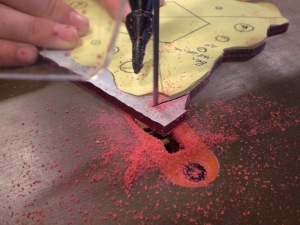
Do not panic if your cut does not go in the wrong direction, just continue and cut that part off and then start again from another place. If your cut goes into the paper and you find yourself cuting off too much of the material, then take the blade out by going backwards with the machine still on and this will remove the blade. When this is done start again from another place.
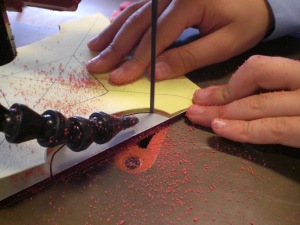 In this picture the person using the saw has almost finished the cut and at this stage they need to be careful and not push the plastic too hard as this will cause the blade to come out very quick and this is dangerous.
In this picture it is very clear that the blower has blown the dust away from the blade and it is easy for the user to see where they are cutting. The person cutting this plastic has their fingers well away from the blade but it is still close enough for them to be able to hold the plastic down to stop it bouncing.
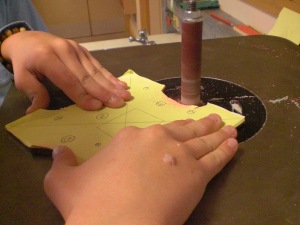
When the plastic has been cut out there will be some rough marks on it, this need to be removed and this is done in a number of ways. This pictre shows one method of removing the rougst parts of the plastic befor the finishing touches are done. This is a bob sander and it is used only for internal curves. This is only the first stage in the finishing process.
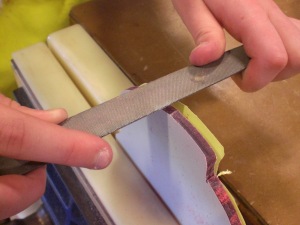 The majority of the finishing will be done by using a file. This will take the rough edges made by the cutting process, when the plastic is fairly smooth then the grades of sandpaper are used prior to polishing. The file used is a half round file, as this has one side of the file round and the other one flat, the round side is used for the internal cuts and the flat sides is used for all others. As you come near to finishing the filing you need to lean lightly on the file as you do not want to remove the marks instead of making more.


could you please put some pictures of the various colours of plastic cause i got stuck when doing my slide-show!!! =D 🙂
is there a special name for the saw we used?? 🙂
Great! This piece of info and all the rest is really helpful for my exams! Thx! =D
great info and lots of it. really helping with revision.